The Wolf Cut Haircut: What to Ask For and How to Style It (35 Variations)
A complete guide to the wolf cut haircut. The exact words to use with your stylist, how to style it at home, and 35 variations organized by length, fringe style, layering intensity, and hair type.
Never miss an update — choose ManPlaybook as your preferred source on Google.
How it works: Tap the button below to open Google’s settings page, then check the box next to ManPlaybook.
Tap the checkbox to turn it blue — that’s how you know it’s set.
I went bald young, so this isn’t a haircut I’ve personally worn either. But I’ve spent years turning things nobody explains clearly into a system anyone can follow. The wolf cut is a good example of a haircut that got popular online faster than anyone wrote down what it actually is. Guys walk into a salon, say “wolf cut,” and get three different results depending on who’s holding the shears.
This guide fixes that. The exact terms that get you the right cut. The styling steps that actually work at home. And 35 variations, so “wolf cut” stops being one vague request and starts being a specific choice.
Quick answer
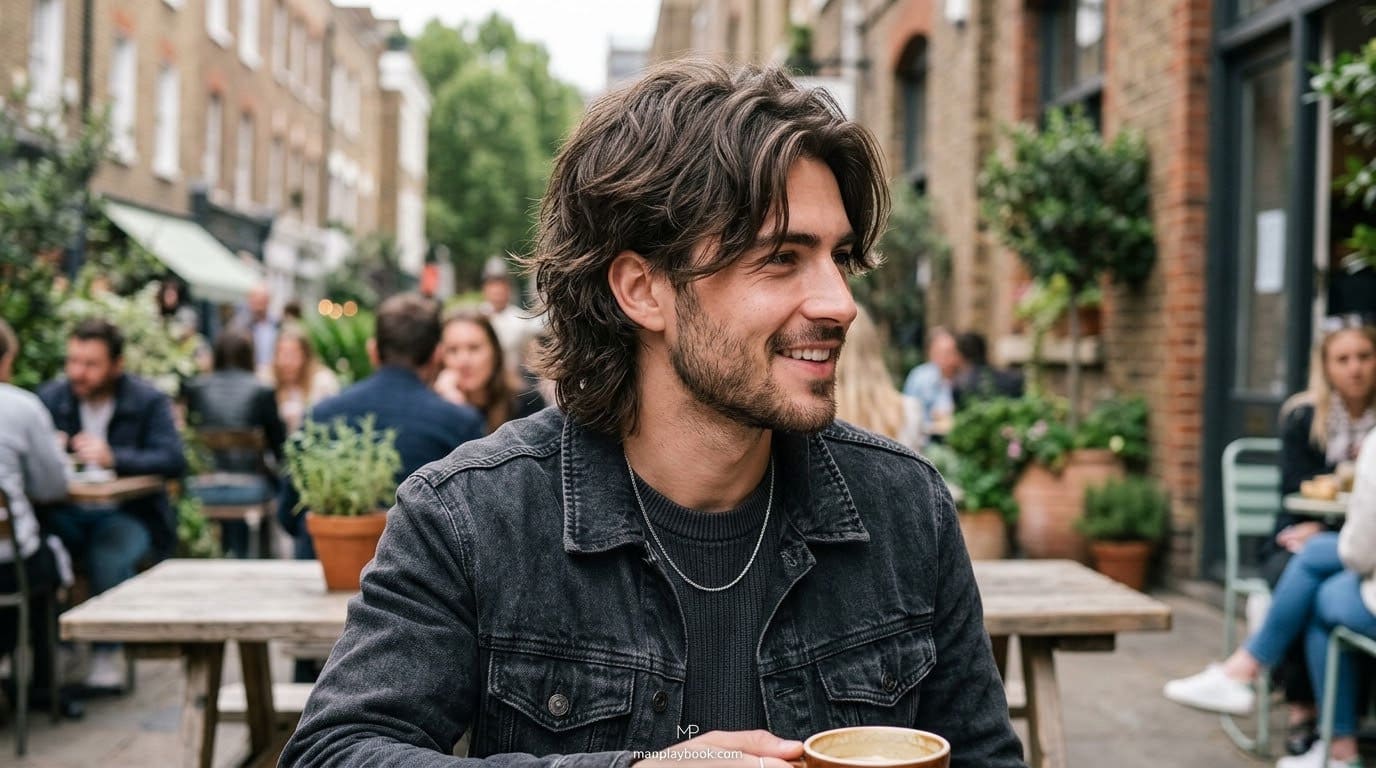
A wolf cut is a heavily layered shag with a length gradient. It’s shorter and more textured on top and around the crown, longer and shaggier toward the ends, usually paired with a curtain or face-framing fringe. It’s a mullet and a shag cut layered on top of each other, not a single traditional cut.
To get it right, tell your stylist three things. The overall length (short, medium, or long). The fringe style (curtain, blunt, or none). And how much layering intensity you want (subtle shag or heavy mullet-leaning wolf cut). Style it with a texturizing spray on damp hair, scrunched upward and outward, not combed flat.
The core cut, explained
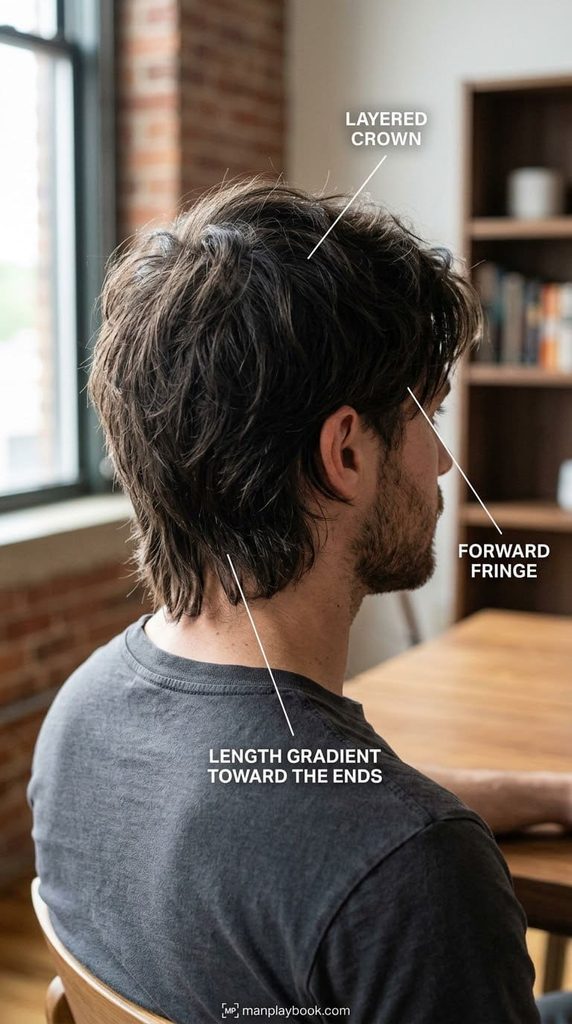
A wolf cut has three parts, and naming all three is what separates a specific request from a random shag.
The crown and top get heavy layering for volume and lift, cut short enough to stand up on their own without looking choppy. This is what gives the wolf cut its signature “just rolled out of bed” texture at the crown.
The length gradient runs from shorter at the top down to longer, shaggier ends, similar to a mullet but blended more gradually. The nape and back usually stay a bit longer than the crown, sometimes noticeably so.
The fringe frames the face, most often cut as curtain bangs that part naturally down the middle and sweep to either side, though a blunt or no-fringe version both exist.
Real mistake people make here: asking for a wolf cut and only describing the length, without specifying how heavy the layering should be. A subtle shag and a heavy mullet-leaning wolf cut can start from the exact same base length and look completely different once the layers are cut in.
What to actually say to your stylist
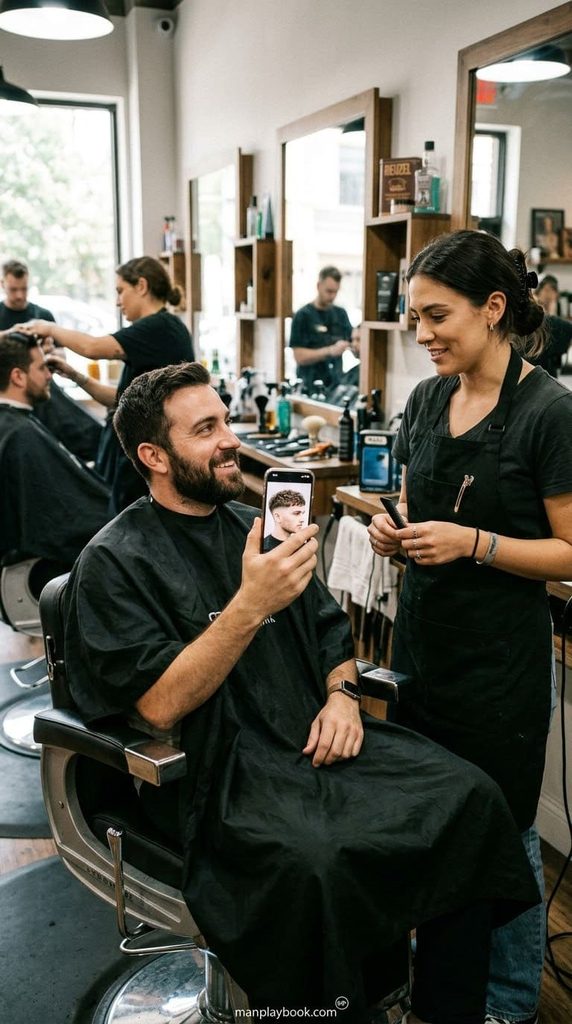
Vague requests get vague results. Here’s language that gets a specific outcome.
Start with the overall length. “Shoulder-length wolf cut” or “a short wolf cut, above the ears” tells your stylist the base length before any layering happens.
Name the layering intensity. “Heavy layers, almost mullet-level in the back” versus “subtle shag, just enough for texture” changes how aggressive the stylist gets with thinning shears and point-cutting.
Describe the fringe specifically. “Curtain fringe, parted down the middle” reads completely differently than “blunt fringe straight across.” Say which one you want. Don’t just say “bangs.”
State how much length you want to keep at the crown versus the ends, not just “layered.” A bigger gap between the shortest and longest layers produces a more dramatic, more textured wolf cut.
Real mistake people make here: bringing a photo but not translating it into words. A photo helps. Describing the length gradient, fringe style, and layering intensity out loud confirms your stylist saw the same details you did.
Who this haircut actually works for
A wolf cut isn’t universal, and knowing where it works saves a wasted cut.
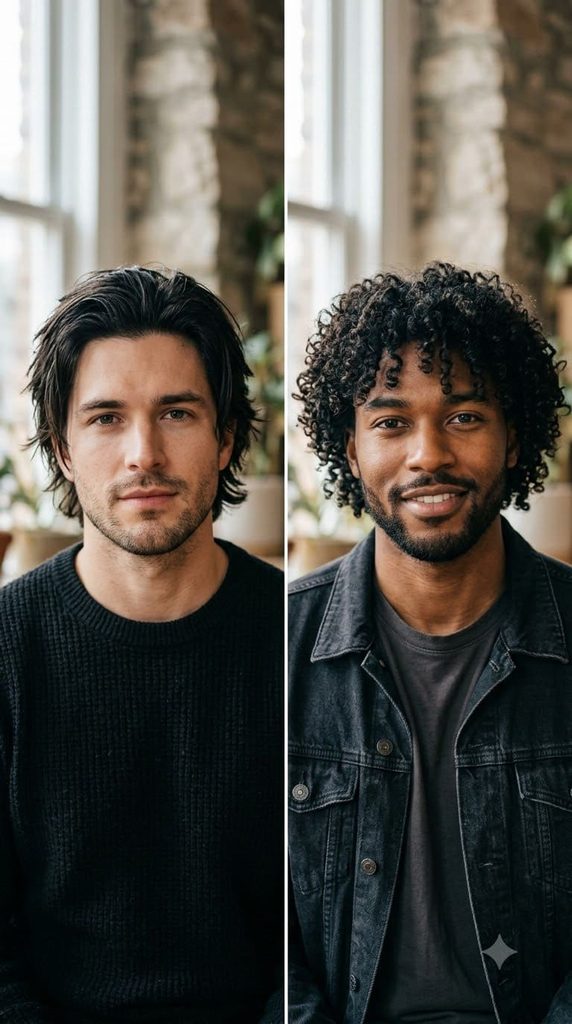
Hair with natural wave or texture holds the shag shape best. Very straight hair can still work. It just needs more product and more deliberate scrunching to fake the texture that wavy hair produces on its own.
A rounder or square face benefits most from curtain fringe with volume at the crown, since the height and the framing pieces both add visual length. A longer or oval face has more room to skip the fringe entirely or go with a shorter, blunter version.
Thick or medium-density hair does better with heavier layering, since there’s enough hair to layer without looking thin. Fine hair usually needs lighter layering and more product to avoid looking sparse at the ends.
Real mistake people make here: copying a photo of a wolf cut on completely different hair density without adjusting the layering intensity. The same haircut on thick hair and fine hair needs different starting numbers to land the same way.
How to style it at home
The cut does most of the work. Styling just finishes it.
Start with damp, not wet, hair. Product distributes more evenly on damp hair. It holds better once the hair fully dries, compared to working product into soaking wet hair.
Use a texturizing spray or a lightweight mousse, not a heavy cream. A wolf cut reads cleaner with lift and texture, not a flat, weighed-down finish. A heavy cream can collapse the crown volume the whole cut depends on.
Scrunch upward and outward, not straight down. The upward direction is what builds the crown volume that makes a wolf cut read as a wolf cut. Combed flat, the same haircut just looks like a regular long layered cut with no shape.
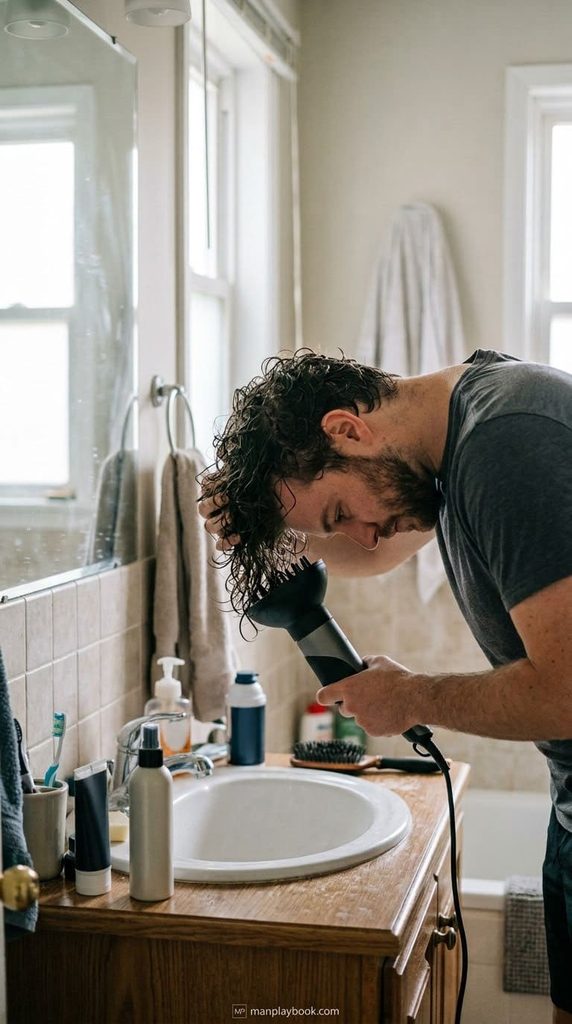
Diffuse or air-dry with your head tipped forward. Heat with a diffuser, or just gravity while air-drying upside down, builds volume at the roots before product locks it in place. Drying with your head upright fights against the lift the style depends on.
Tiered version: if you only have thirty seconds, damp hair plus a small amount of texturizing spray scrunched in covers the basics. The diffuse-or-flip-upside-down step adds volume and lasts longer through a full day, worth it for anything beyond a quick weekday morning.
Real product picks for styling
Two products cover most of what a wolf cut actually needs.
| Product | Why it’s here |
|---|---|
| L3 Level 3 Sea Salt Spray, Texturizing | Adds texture and a light, flexible hold without weighing down the shaggy ends. |
| Avenue Man Volume Lift Mousse | Built for lift and thickness at the root, useful for building the crown volume this cut depends on. |
What it costs and how to book it
A wolf cut isn’t a specialty cut. But the layering work behind it usually takes longer than a basic trim, so expect to pay closer to a layered-cut price than a simple one-length cut. Most salons and barbershops charge somewhere between $35 and $80 depending on the shop, the city, and whether it includes a blowout finish.
Book with a stylist who does layered cuts and shags regularly. A wolf cut lives or dies on the layering work, not the base length. A stylist who mostly does one-length trims may not have the point-cutting or thinning-shear experience a good wolf cut needs. Check a salon’s Instagram or Google reviews for shag or layered work specifically before booking a first appointment.
Ask for 20 to 30 extra minutes on a first visit. The first cut takes longer since the stylist is figuring out your hair’s natural texture and how it falls once layered. Rushing that first appointment is how guys end up with layers cut too heavy, thinning the ends out more than intended.
Tip 15 to 20 percent if the cut matches what you asked for. Standard salon etiquette applies here the same as any other haircut. A stylist who took the time to confirm length, fringe style, and layering intensity before cutting earned that tip more than one who just started cutting.
How often to get it cut
Every 8 to 12 weeks keeps the shape clean. A wolf cut grows out more forgivingly than a fade does. The layering is designed to blend as hair gets longer rather than needing a sharp line maintained. The crown volume and the fringe are usually the first parts to need a trim.
Real mistake people make here: waiting until the whole haircut looks like one flat length before booking the next appointment. The fringe and the top layers usually need attention well before the overall shape looks overgrown.
35 variations to choose from
“Wolf cut” covers a lot of ground. These are organized by the detail that actually changes, not just listed as 35 photos with no structure.
By length (8 variations). Each one changes how dramatic the length gradient reads, from close-cropped to shoulder-grazing.
1. Short wolf cut
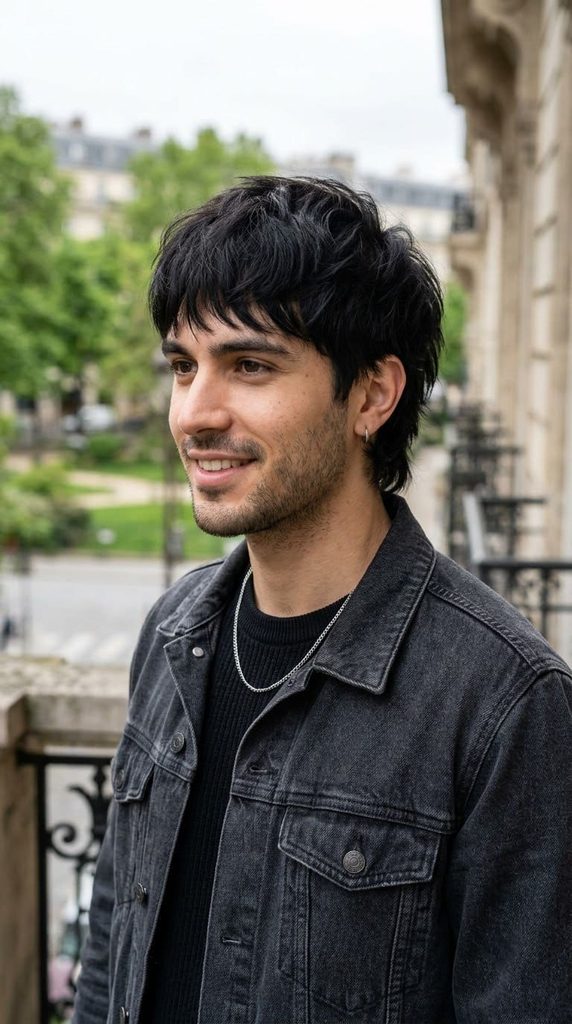
A cropped, above-the-ear version with heavy layering packed into a shorter overall length. Ask for the layers to start close to the scalp at the crown so the volume still reads even at a shorter length.
2. Medium wolf cut
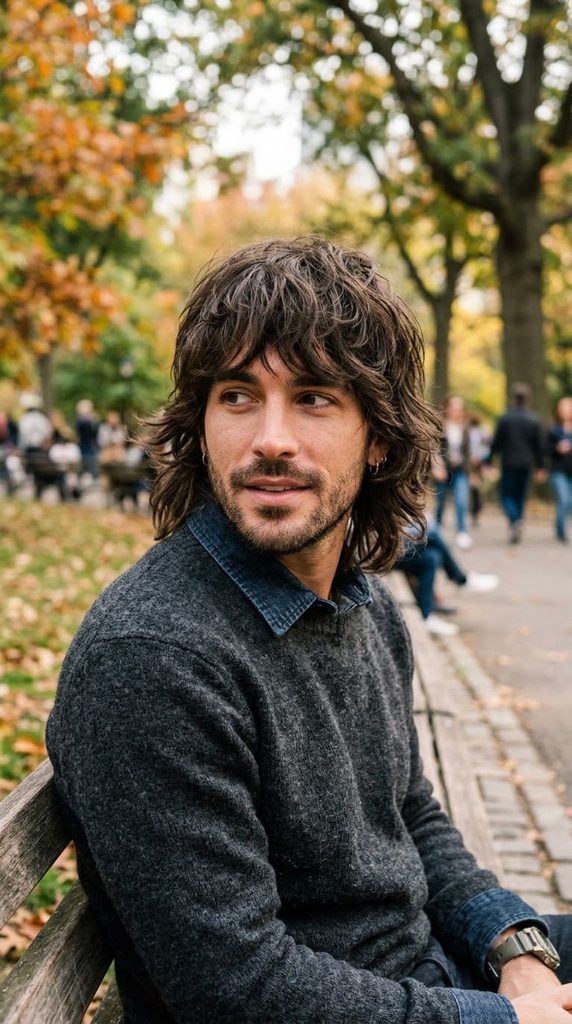
Falls around the jaw to collarbone, the most common length people picture when they say “wolf cut.” Blow-dry with a round brush at the crown to keep the volume from falling flat at this in-between length.
3. Long wolf cut
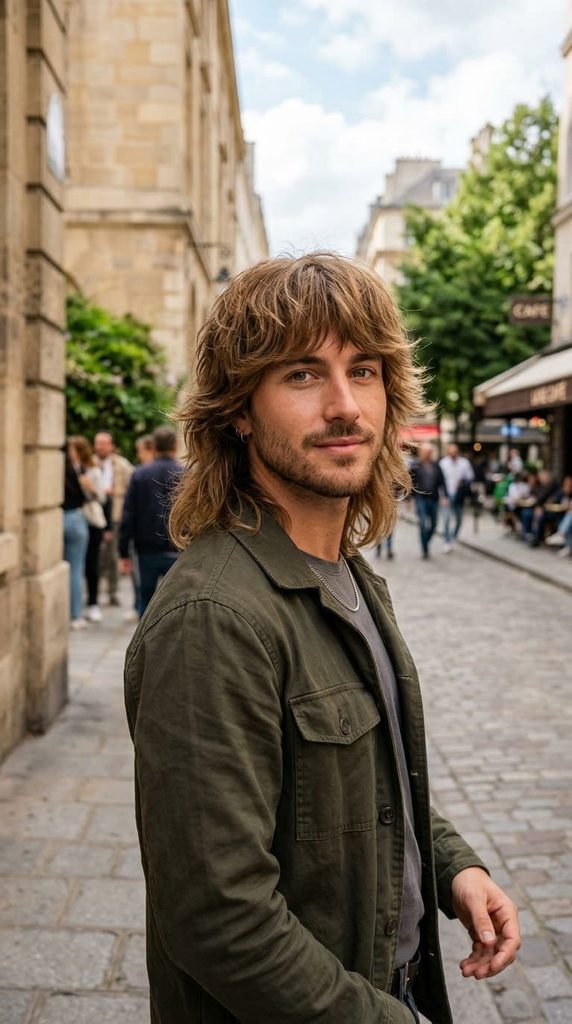
Shoulder-length or past it, with the layering concentrated more toward the top and less toward the ends. Use a heavier texturizing product on the ends since longer hair loses shape faster without it.
4. Cropped nape, longer front
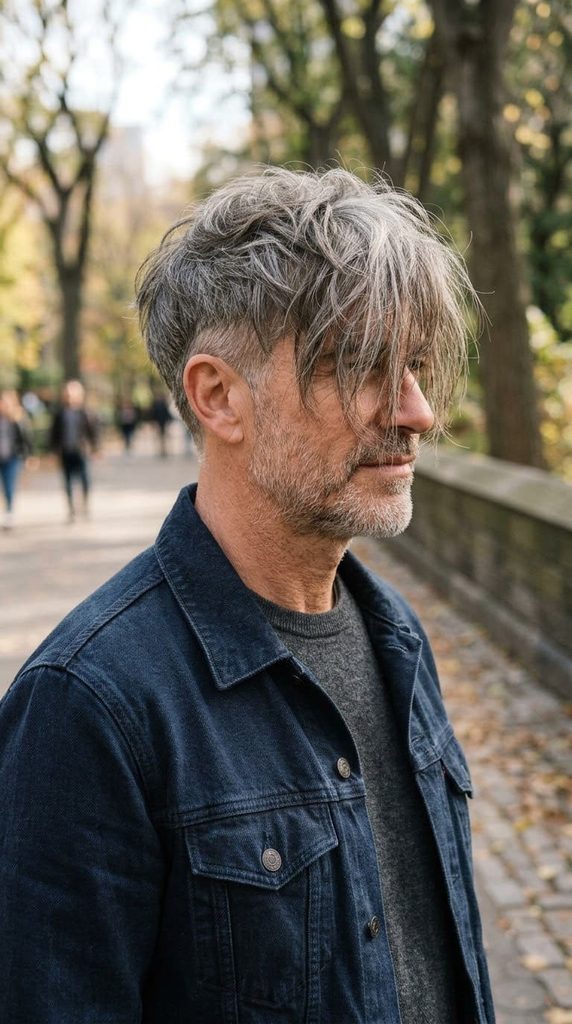
The back and nape are cut noticeably shorter while the front and fringe stay longer, exaggerating the mullet influence. Confirm the exact length gap at the nape with your stylist, this version depends on contrast to read correctly.
5. Shoulder-length shag
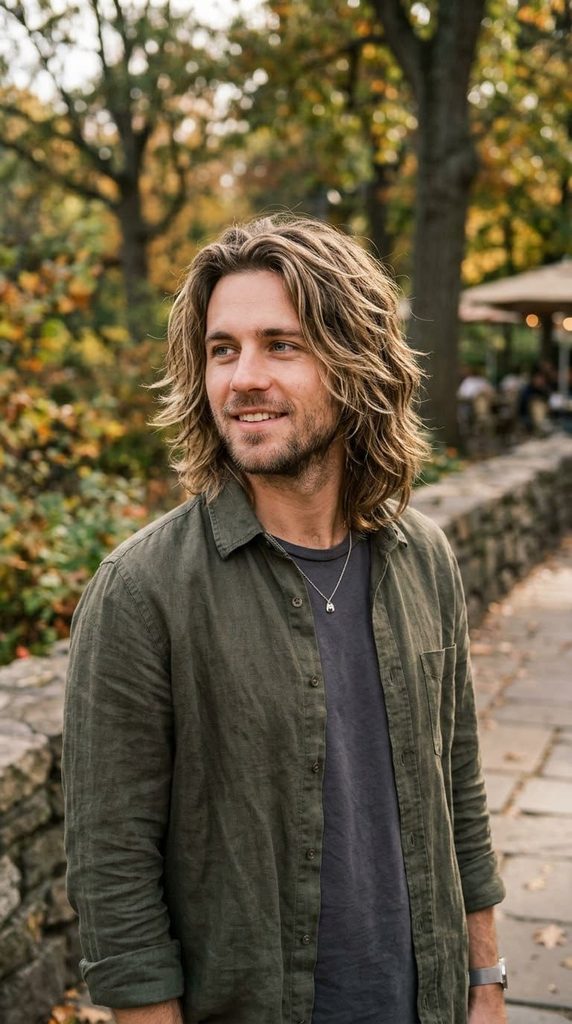
A softer, longer take with lighter layering than a classic wolf cut, closer to a traditional shag with wolf-cut influence at the crown. Ask for lighter thinning throughout so the ends keep some weight instead of feathering out completely.
6. Extra shaggy wolf cut
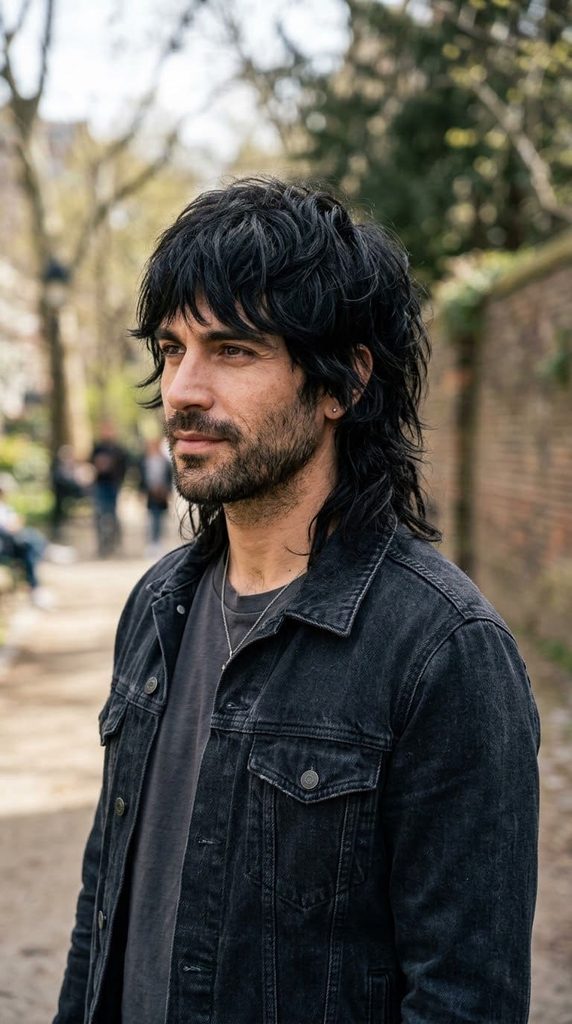
Maximum layering and texture throughout, the most deliberately undone version of the cut. This version needs the most product and the most scrunching effort to hold its shape through a full day.
7. Undercut wolf cut
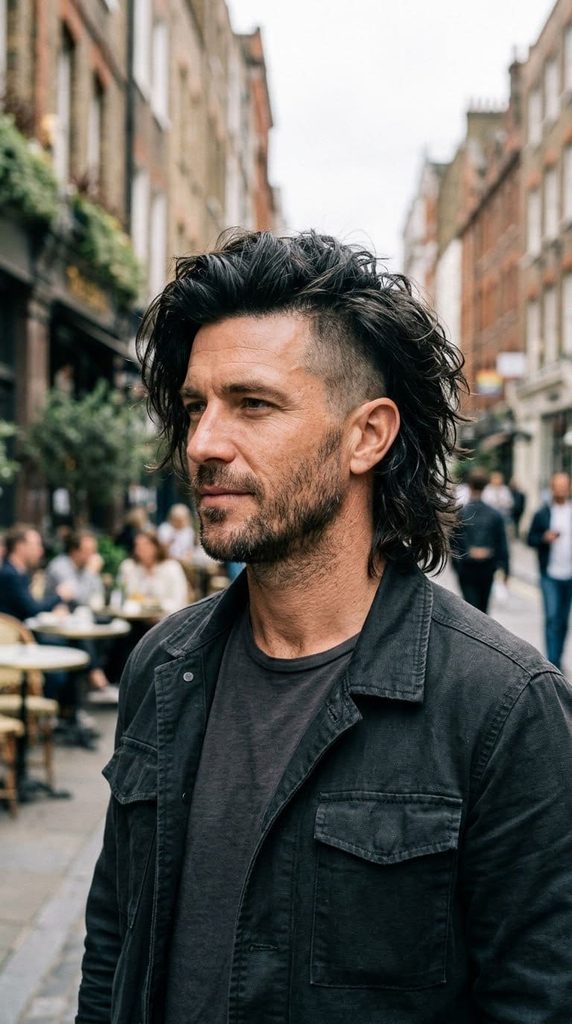
Shaved or heavily faded sides paired with a long, layered wolf-cut top, combining two haircuts into one. Ask your barber to blend the undercut into the layered top gradually instead of leaving a hard shelf line.
8. Wolf bob
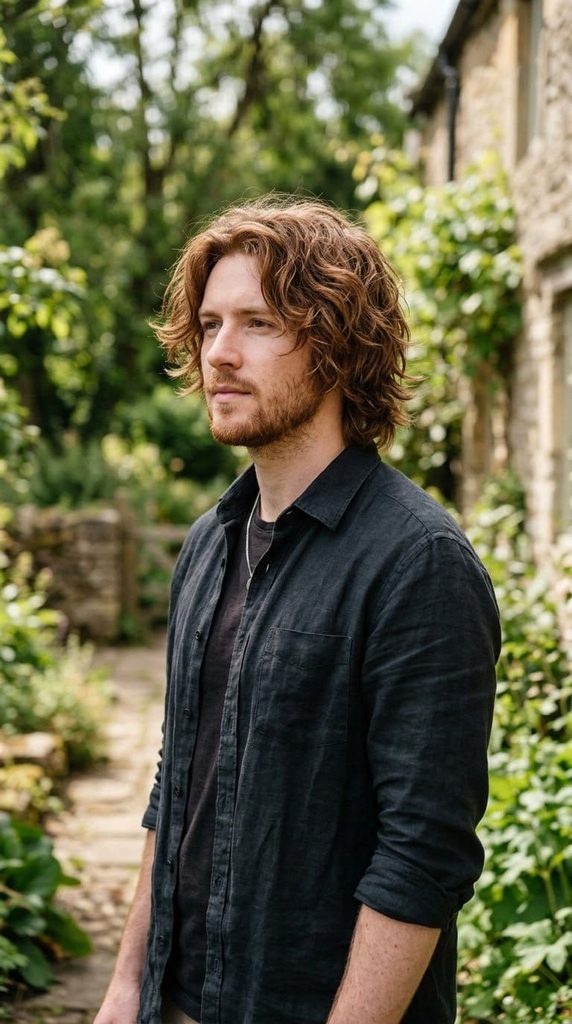
A chin-to-jaw length version, the shortest full-length take on the cut, heavily layered for texture at that length. This version needs the crown layers cut shortest of any length variation to keep proportion at a shorter overall cut.
By fringe style (8 variations). The fringe is the part most guys describe the least clearly, so this is worth reading closely.
9. Curtain fringe
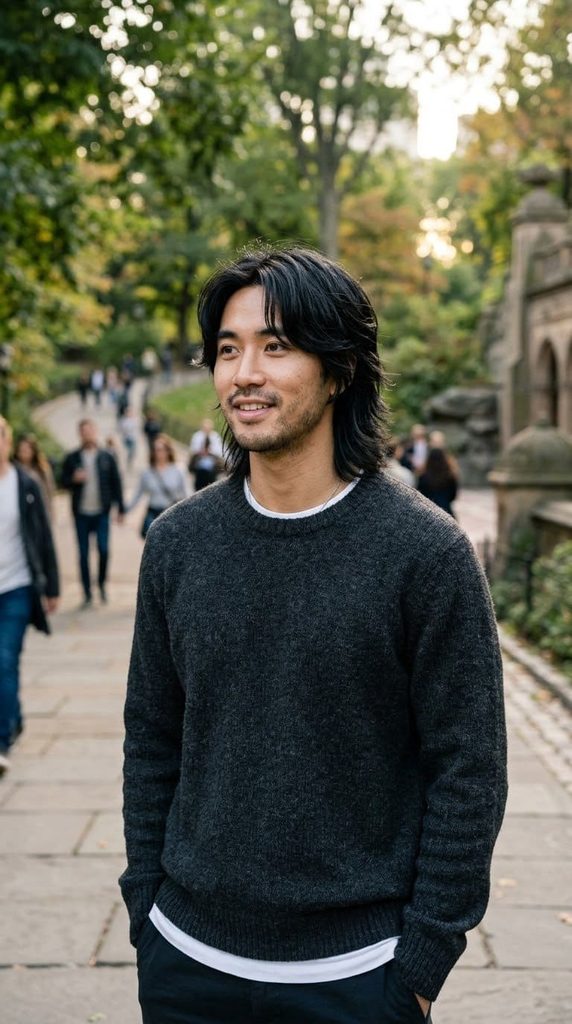
Parted down the middle and swept to both sides, the most recognizable fringe pairing for a wolf cut. Blow-dry each side outward with a round brush to set the part before any product goes in.
10. Blunt fringe
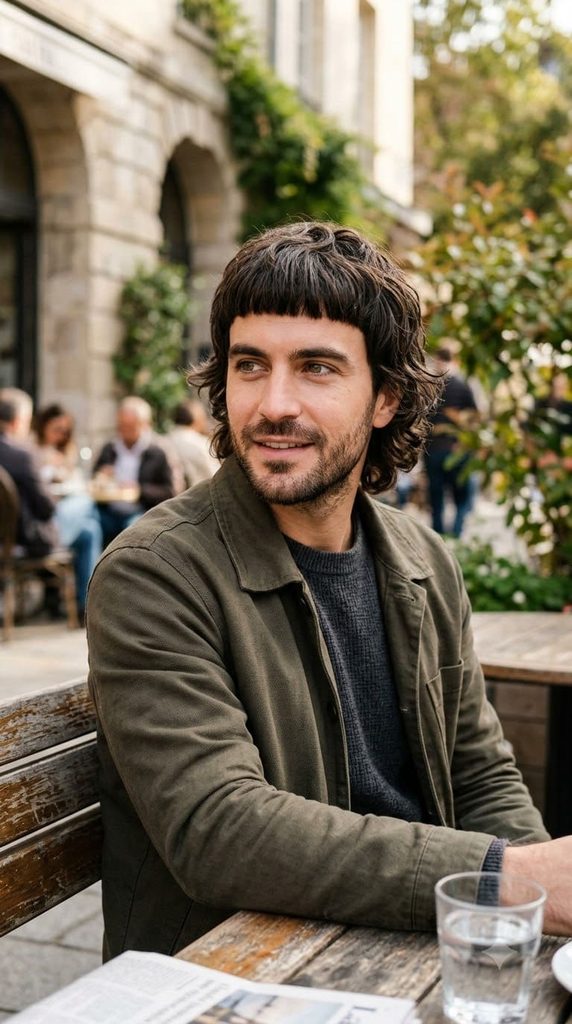
Cut straight across instead of parted, a sharper contrast against the shaggy layers behind it. Keep this fringe combed rather than scrunched, it holds its line better dry than damp.
11. Side-swept fringe
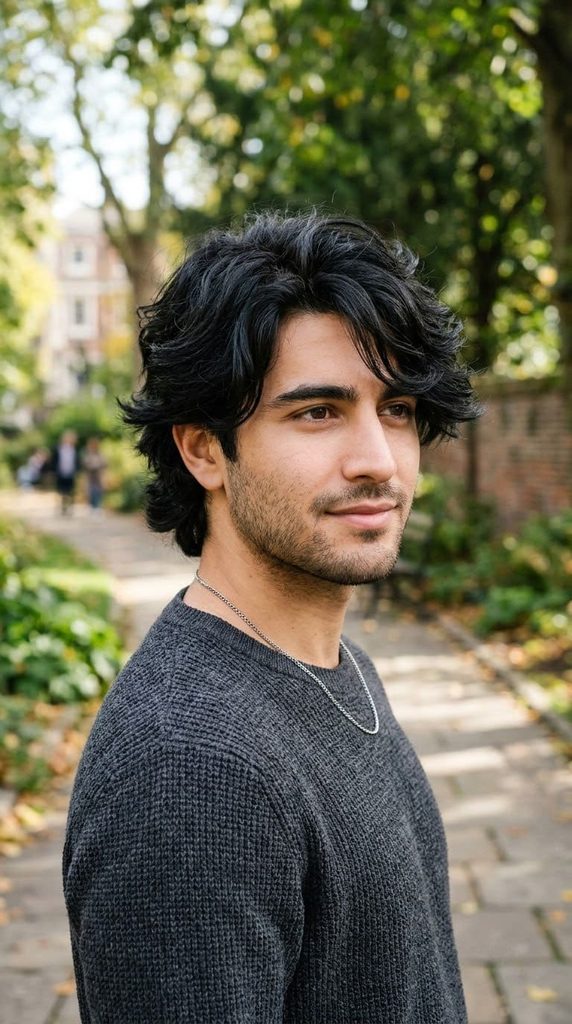
Angled to one side instead of parted center, a slightly less symmetrical take on curtain bangs. Dry it toward the side you want it to fall while it’s still damp, hair holds direction better set while wet.
12. No fringe, face-framing layers only
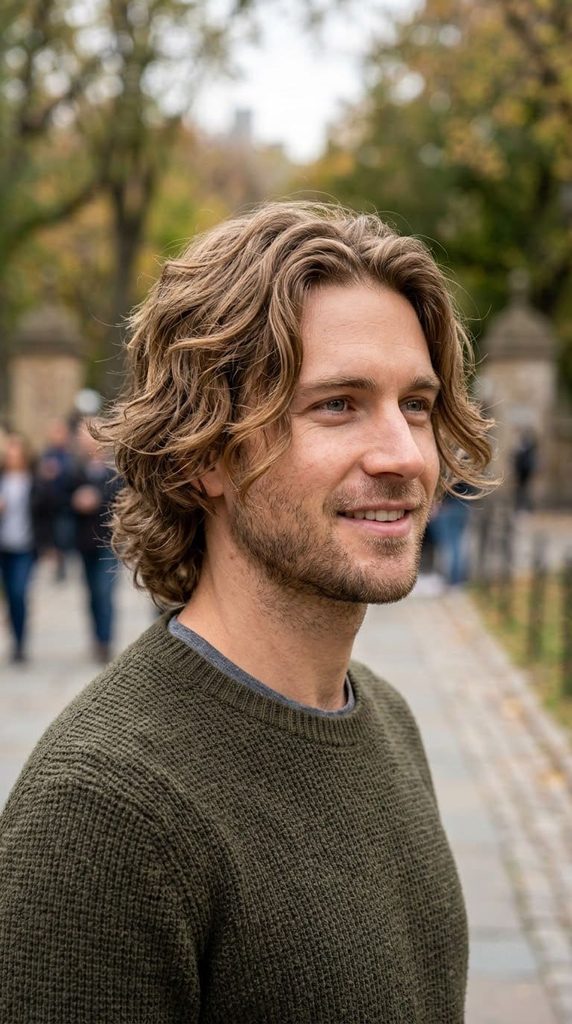
Skips a true fringe entirely, relying on longer face-framing layers to do the same job. Ask for the face-framing pieces cut a few inches longer than the rest so they still move independently.
13. Micro-fringe
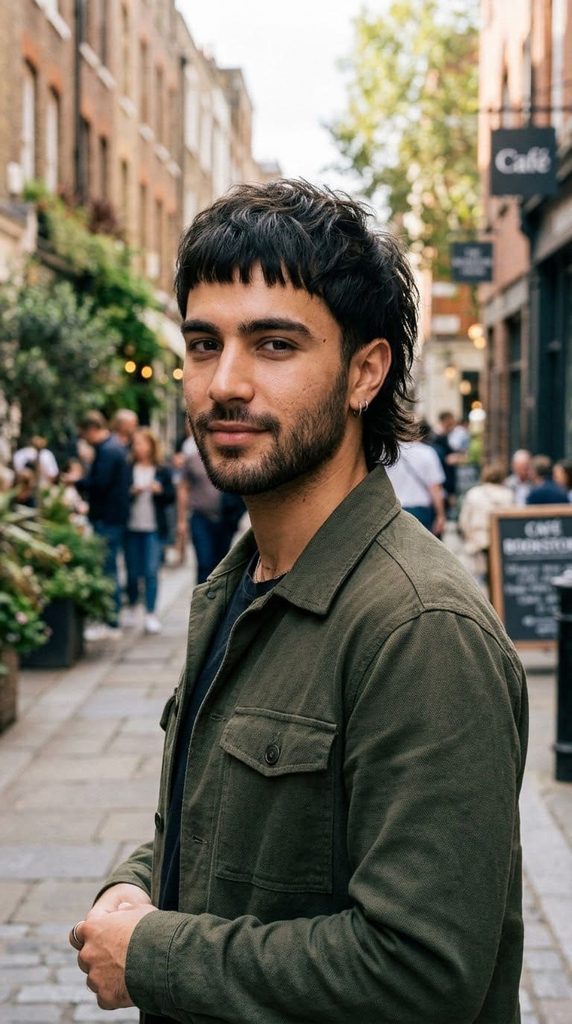
A short, barely-there fringe that clears the eyebrows, paired with heavier layering everywhere else. This version puts more visual weight on the crown volume since the fringe itself does less framing work.
14. Heavy fringe
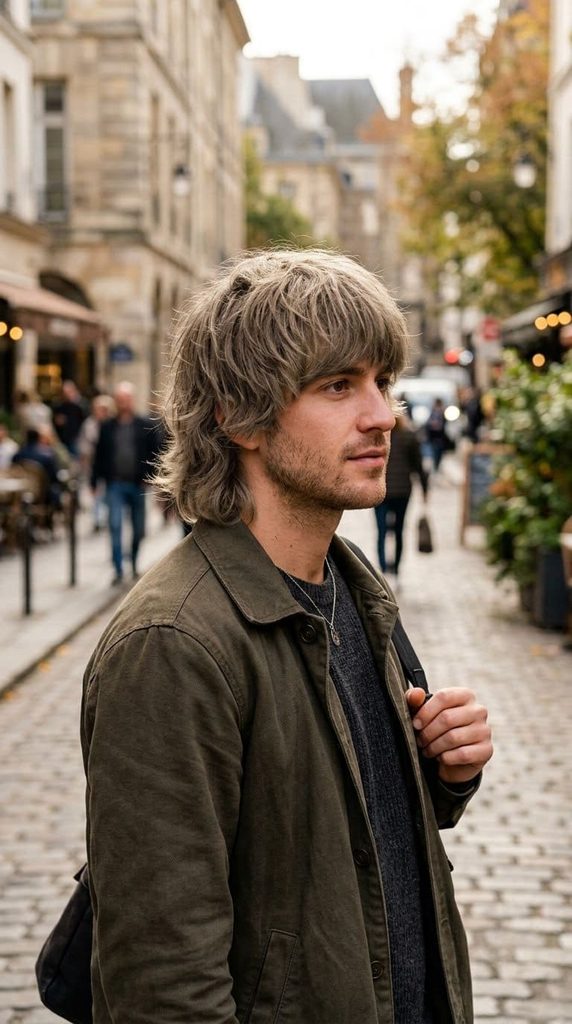
A thicker, more substantial fringe than a typical curtain, covering more of the forehead. Trim this fringe every 3-4 weeks on its own, it grows out and loses shape faster than the rest of the cut.
15. Wispy fringe
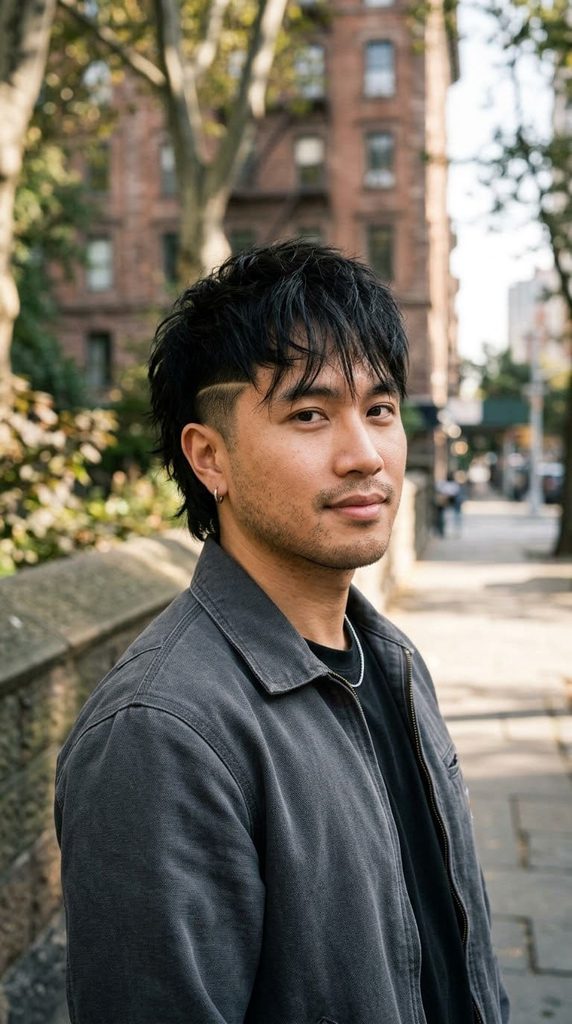
Thin, feathered pieces instead of a solid fringe block, a softer and more textured framing option. Point-cutting is what creates this look, ask your stylist for it by name rather than just “thin bangs.”
16. Deep side part fringe
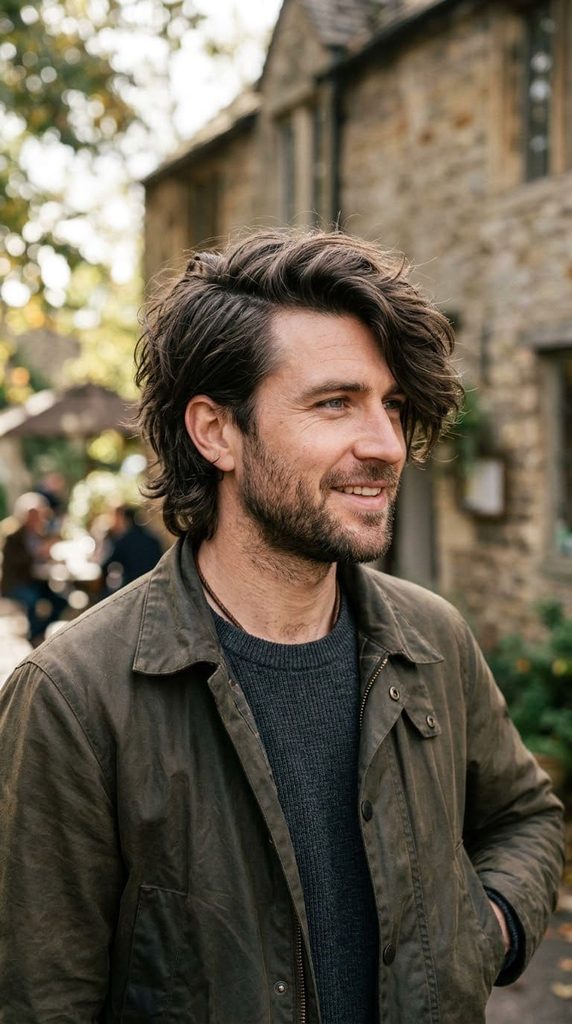
A fringe pushed almost entirely to one side with a deep, defined part, more dramatic than a standard side-sweep. Use a small amount of product right at the part line to keep it from drifting back to center through the day.
By layering intensity (6 variations). The layering is what actually separates a wolf cut from a regular shag, so this category matters as much as length.
17. Subtle shag layering

Light layering throughout, closer to a traditional shag with just a hint of wolf-cut texture at the crown. This is the safest starting point if you’re not sure how much layering you want committed to on a first cut.
18. Heavy mullet-leaning layers
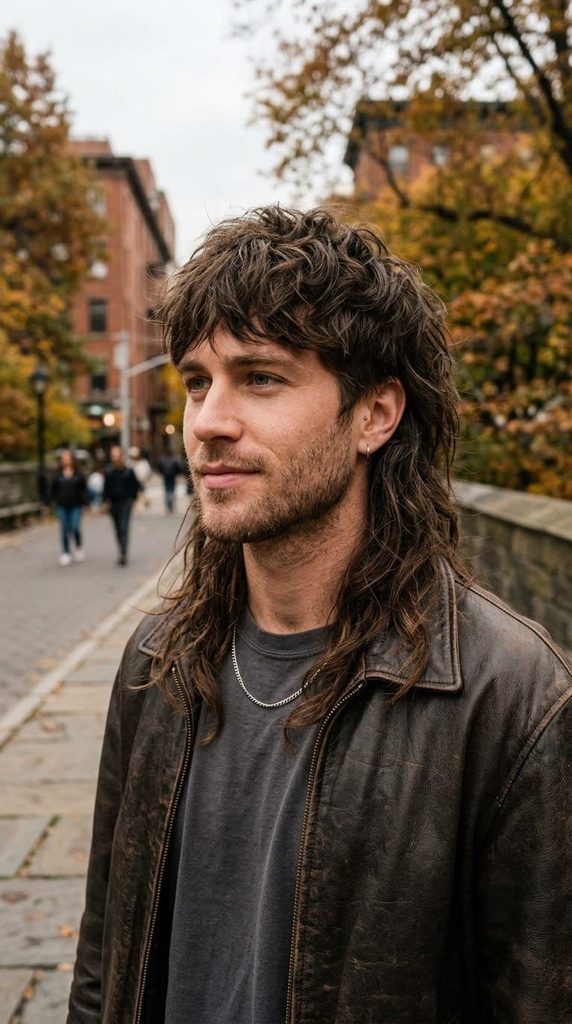
Aggressive layering with a pronounced length gap between the crown and the back, closer to the mullet end of the wolf-cut spectrum. Confirm the exact length difference in inches with your stylist, “heavy” means different things to different stylists.
19. Disconnected wolf cut
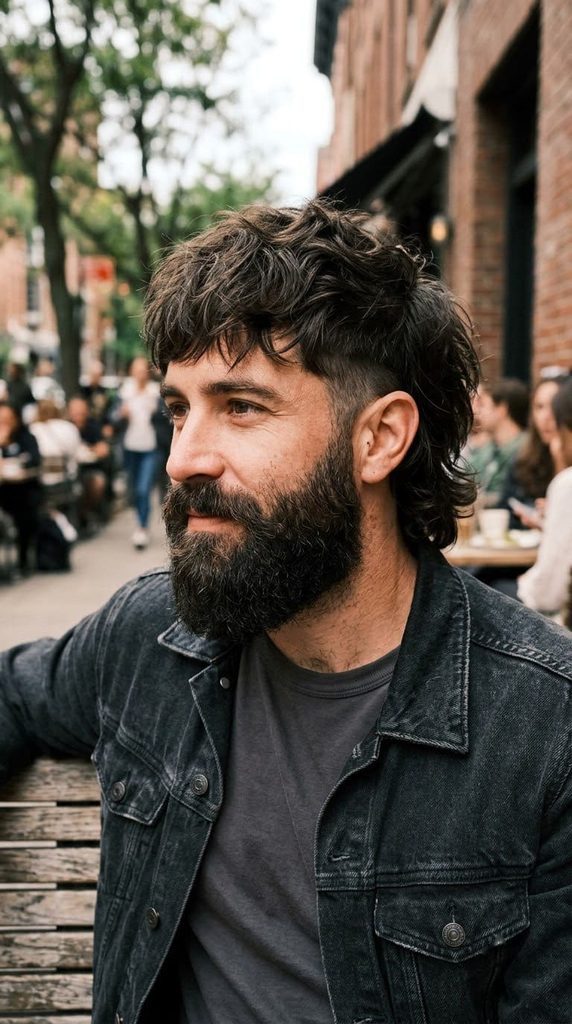
A hard, visible line between the shorter crown layers and the longer bottom layers instead of a gradual blend. This version reads more editorial and less everyday, mention specifically if you want the disconnection visible rather than blended.
20. Face-framing focus
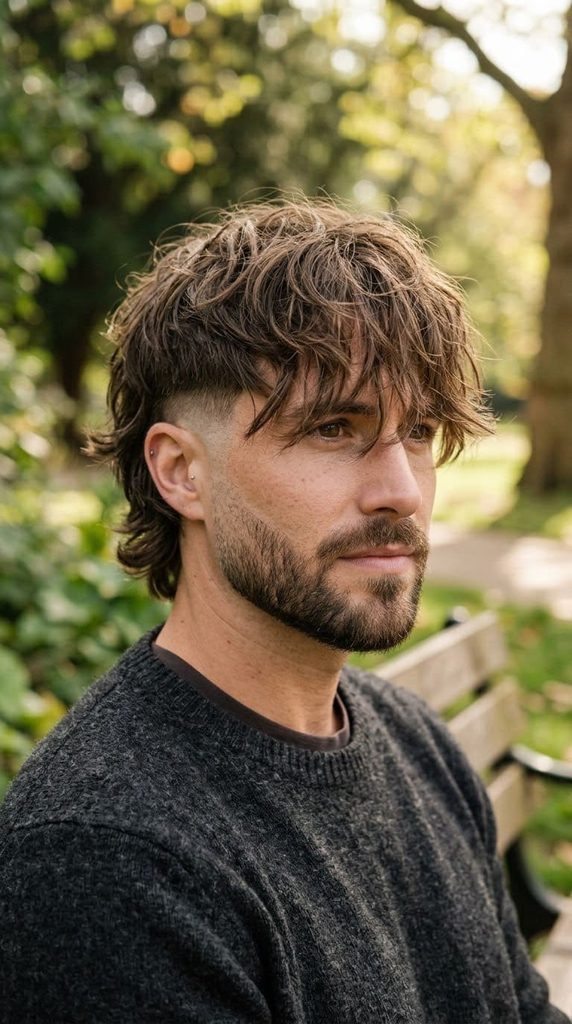
Layering concentrated mostly around the face and fringe, with lighter layering through the back and crown. Good if you want the wolf-cut look up front without committing to heavy texture throughout.
21. Crown-focused volume
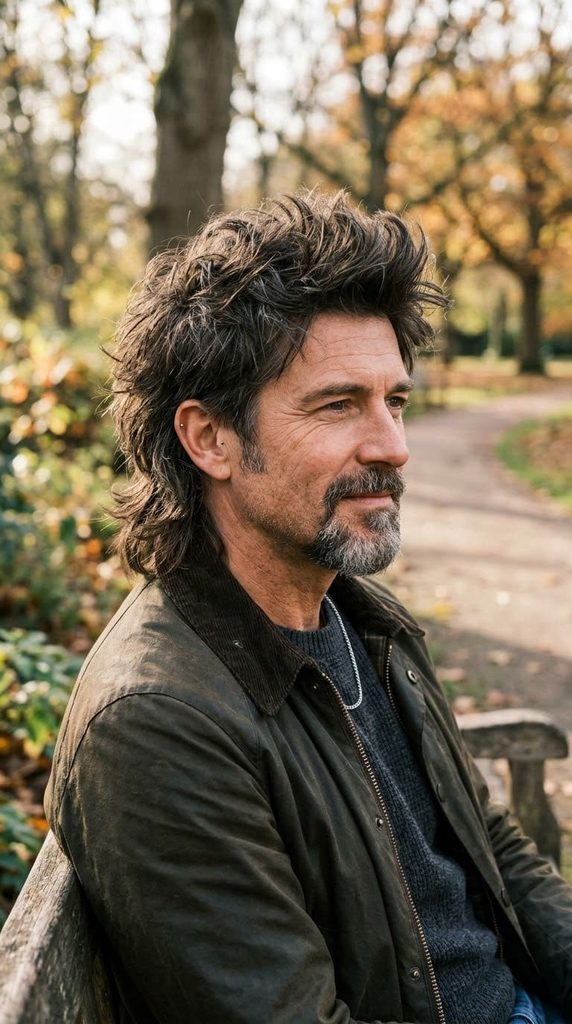
Heaviest layering concentrated at the crown for maximum lift, with lighter layering elsewhere. Diffuse-drying with your head tipped forward matters most for this version, the crown volume is the entire point.
22. Wolf mullet hybrid
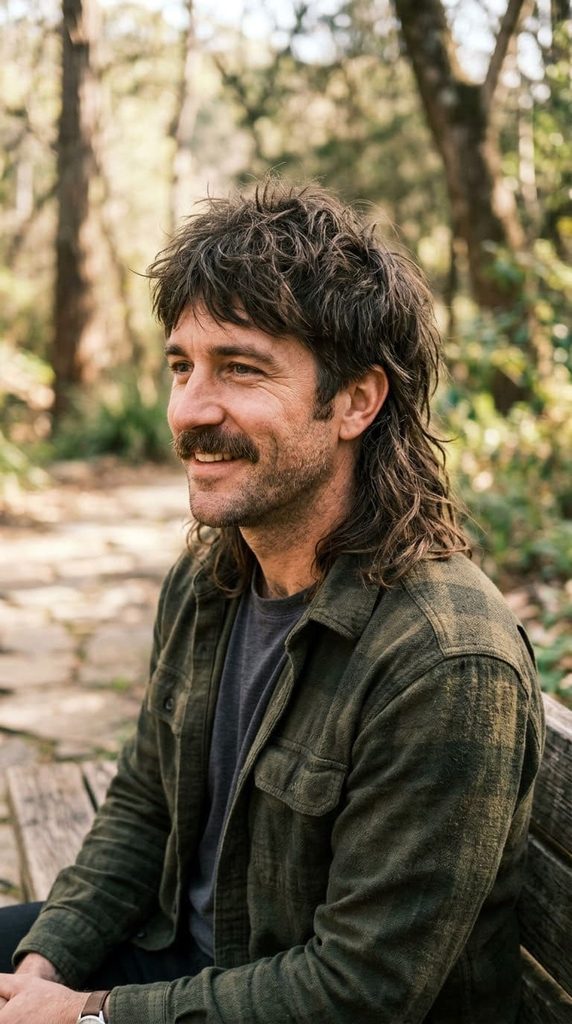
Leans further into mullet territory than a standard wolf cut, with a shorter top and longer, less-layered back. Be specific that you want mullet influence, a stylist defaulting to a standard wolf cut will layer the back more than this version calls for.
By hair type adaptation (5 variations). The same haircut needs different starting numbers depending on hair type.
23. Straight hair
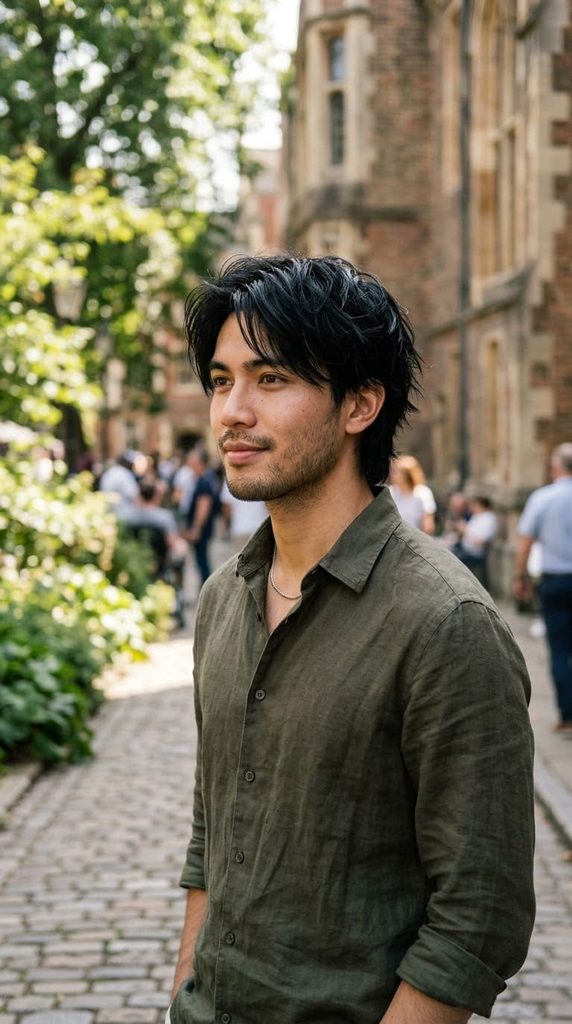
The version that needs the most product and technique, since straight hair doesn’t hold shag texture on its own. A texturizing spray plus a diffuser is close to mandatory here, without both this cut can look flat fast.
24. Wavy hair
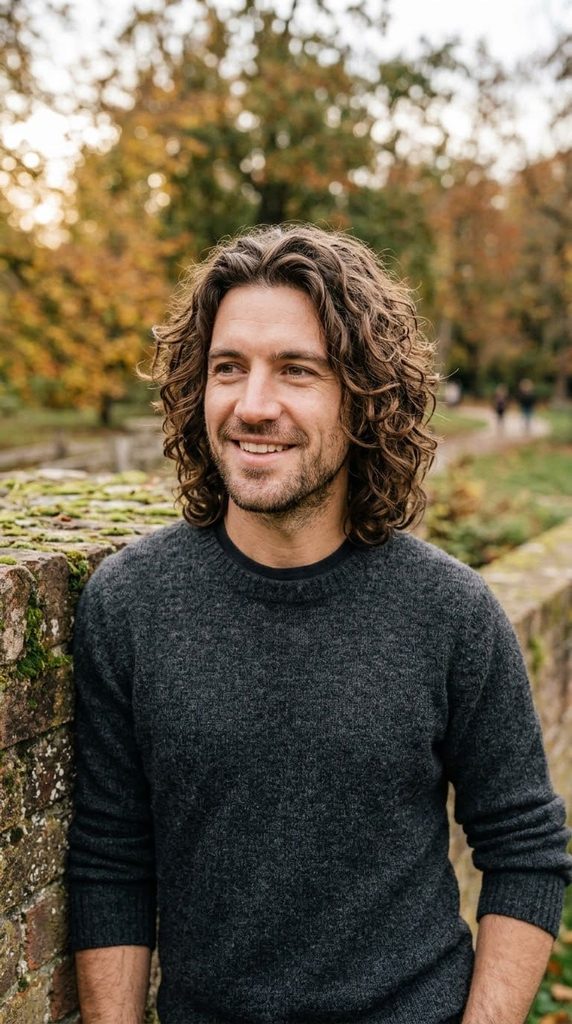
Holds the shag shape naturally, needs less product and less deliberate styling than straight hair. A light sea salt spray on damp hair is usually enough to finish the look.
25. Curly hair
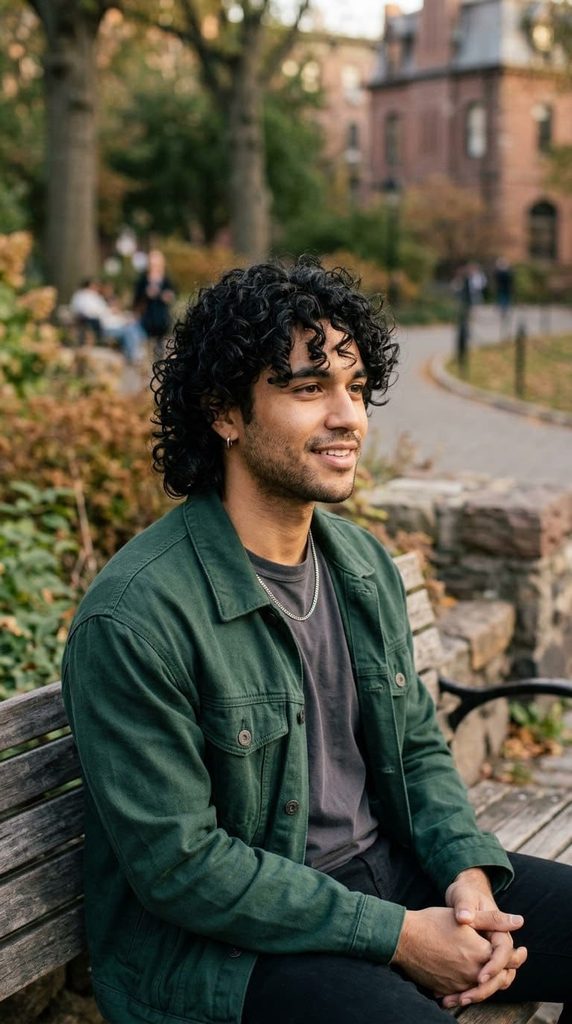
The layering reads as texture almost automatically, curls do a lot of the wolf-cut work without extra styling. Use a curl cream instead of a texturizing spray, curly hair needs moisture more than it needs grit.
26. Coily hair
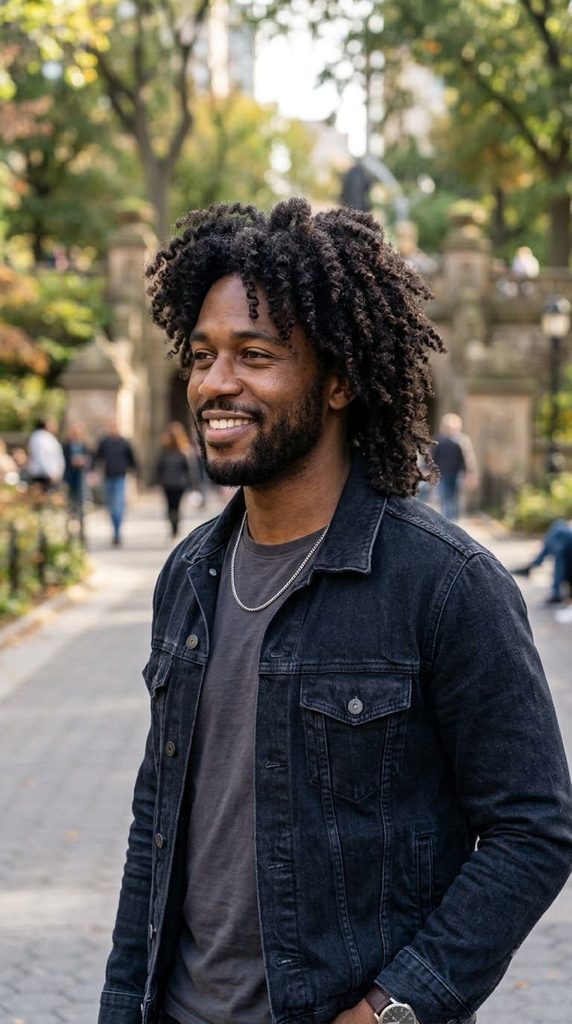
Naturally builds the volume and shape a wolf cut is designed around, often with less layering needed to get the same effect. A leave-in conditioner before any styling product keeps coily hair from drying out under regular product use.
27. Fine or thinning hair
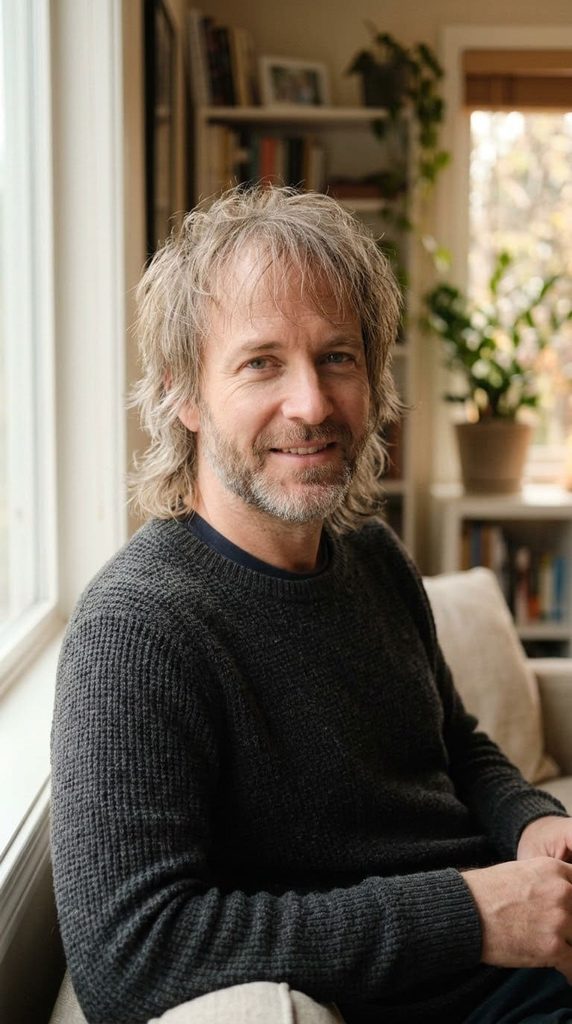
Needs lighter layering than thick hair, heavy layering on fine hair can look sparse rather than textured. A volumizing mousse at the root does more here than a texturizing spray applied to the ends.
By color and finish (4 variations). Color and finish change the look without changing the cut itself.
28. Natural color
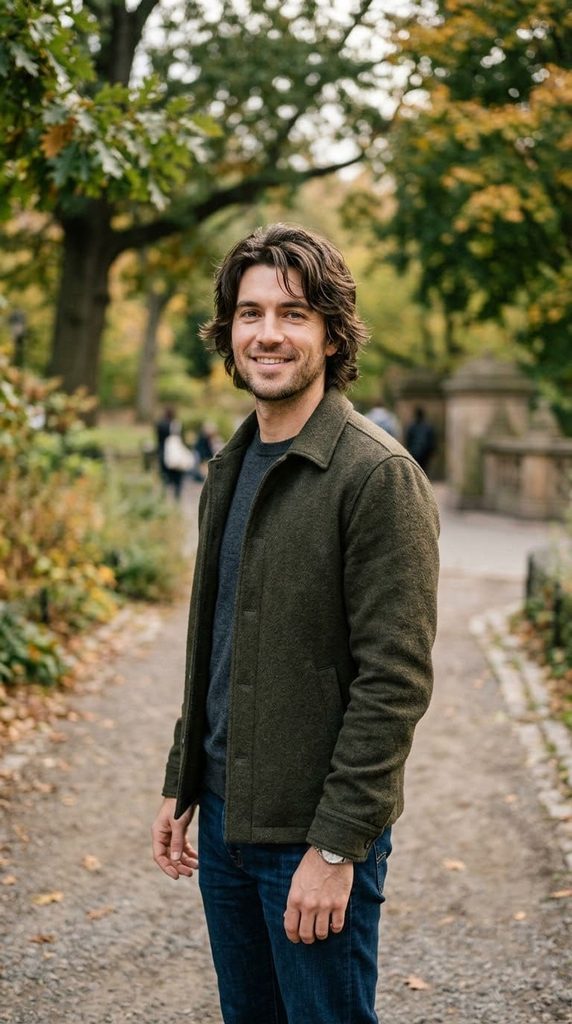
No color treatment, letting the layering and length gradient carry the look on their own. No extra styling step needed beyond the standard texturizing-spray-and-scrunch routine.
29. Money-piece highlight
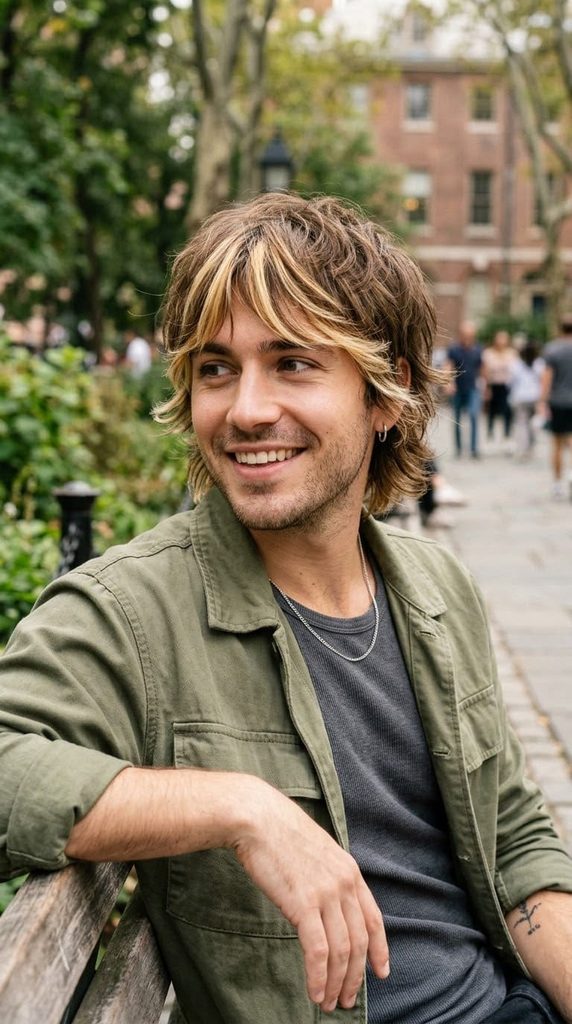
A highlight concentrated around the face-framing pieces, adding contrast right where the fringe catches the light. Ask a colorist for the highlight placed specifically on the pieces that fall forward, not scattered throughout.
30. Full color change
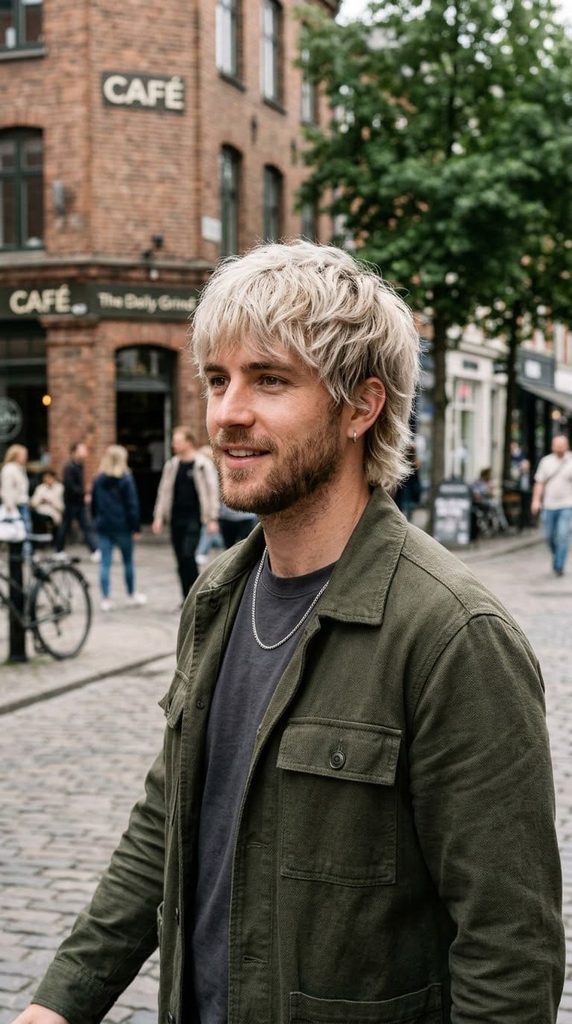
A complete color change, same layered cut underneath, for a bigger visual shift. Book the color and the cut on separate visits when possible, cutting freshly colored hair the same day can be harder to judge accurately.
31. Grown-out balayage
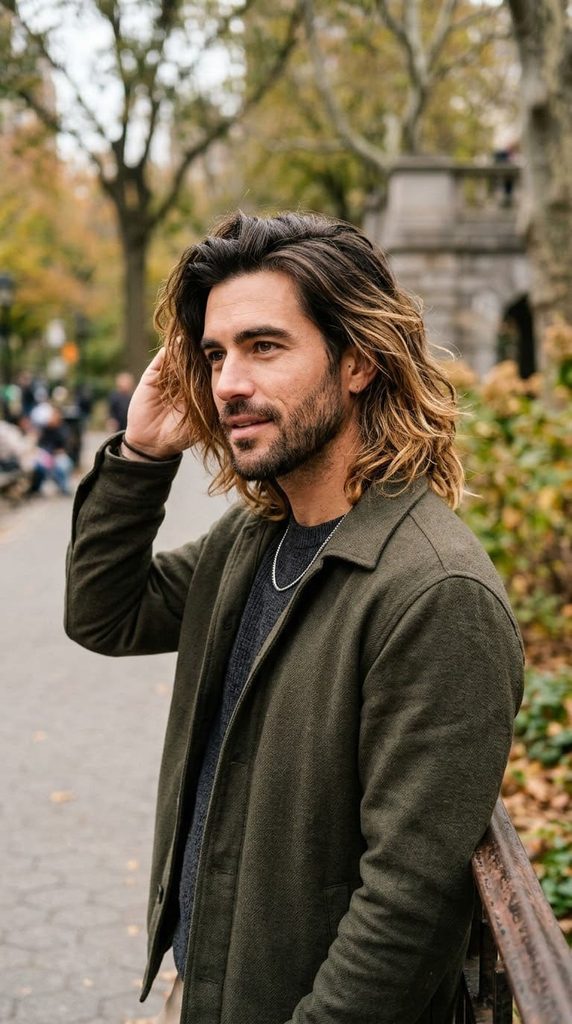
Lighter, sun-kissed ends that fade upward into a darker natural root, a low-maintenance color pairing for a wolf cut. This coloring technique needs less frequent touch-ups than a full color change, which fits a cut that’s already grown-in friendly.
By formality (4 variations). The same cut styled differently for different parts of the week.
32. Work-ready
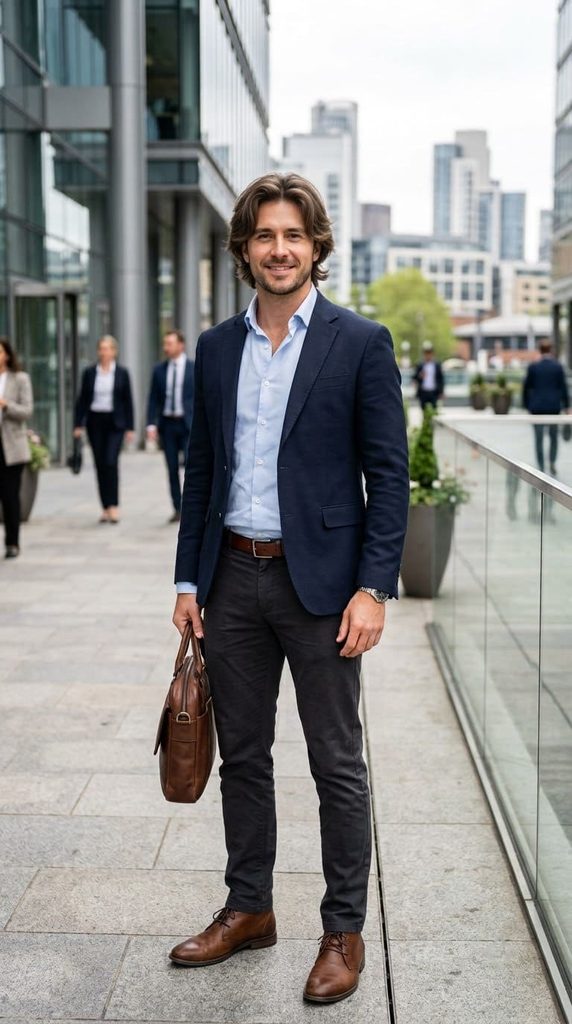
Blown out smoother with less scrunched texture, and the fringe combed rather than left loose, for a cleaner professional look. Use a round brush while blow-drying to control the volume instead of letting it air-dry into full texture.
33. Casual weekend
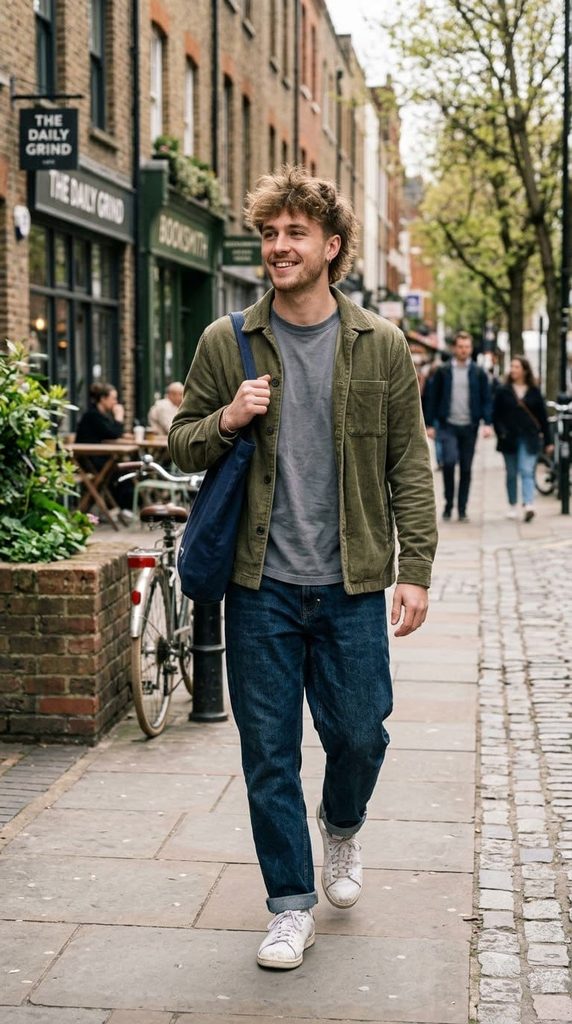
Air-dried with a texturizing spray scrunched in, the most relaxed and lowest-effort version of the style. This is the version that takes the full thirty-second tiered routine and nothing more.
34. Event-ready
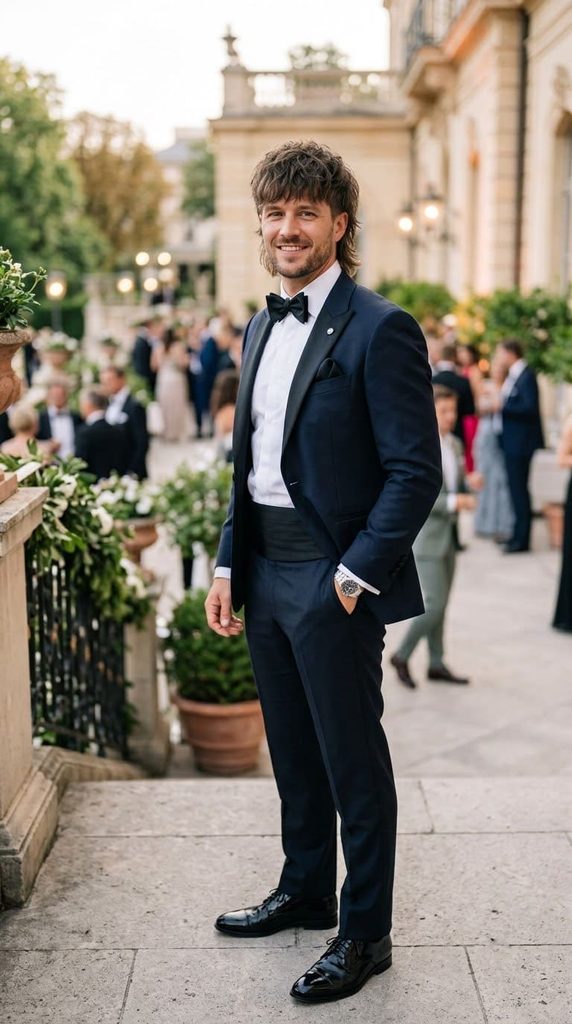
Extra volume and a stronger-hold product for a finish that survives a full day of photos, with the fringe styled more deliberately. Blow-dry with a diffuser first, then set with a stronger-hold mousse over the texturizing spray.
35. Gym or athletic

Pulled back or pinned at the crown for workouts, with the length doing more work than heavy styling product. A few small clips at the crown keep the longer layers out of the way without needing product at all.
Real mistake people make here: picking a variation based on a photo alone without checking which category actually drives the difference, length, fringe style, or layering intensity. Two haircuts can look similar in a photo. They can still require completely different instructions to your stylist.
The pattern behind it all
Every variation above still comes back to the same three parts covered at the start. Crown, length gradient, and fringe. Changing one detail, length, layering intensity, or fringe style, creates a different look. The underlying haircut stays the same.
I expected this to be mostly about finding the right photo to bring in. It’s mostly about having the right words ready before you sit down, which turned out to matter more than the photo itself.
FAQ
Is a wolf cut the same thing as a shag? Related, but not identical. A shag is the base layering technique. A wolf cut adds a more dramatic length gradient and, usually, curtain bangs on top of that shag foundation.
Does this haircut work with thinning hair? Sometimes, with adjustments. Lighter layering and more volumizing product at the root work better than heavy layering, which can make thinning hair look sparser instead of fuller.
How much does styling product matter compared to the cut itself? The cut matters more. A great cut with no product still holds a reasonable shape. Product builds the volume and texture, but it can’t fix layers that were cut too heavy or too light for your hair density in the first place.
Can I switch between these 35 variations without a full new haircut? Some, yes. Fringe styling and color pairing can change day to day or with a salon visit. Length and layering intensity adaptations usually need an actual cut to switch between.
Never miss an update — choose ManPlaybook as your preferred source on Google.
How it works: Tap the button below to open Google's settings page, then check the box next to ManPlaybook.
Tap the checkbox to turn it blue — that's how you know it's set.